Category: Product Review

CEEPO Venom Review

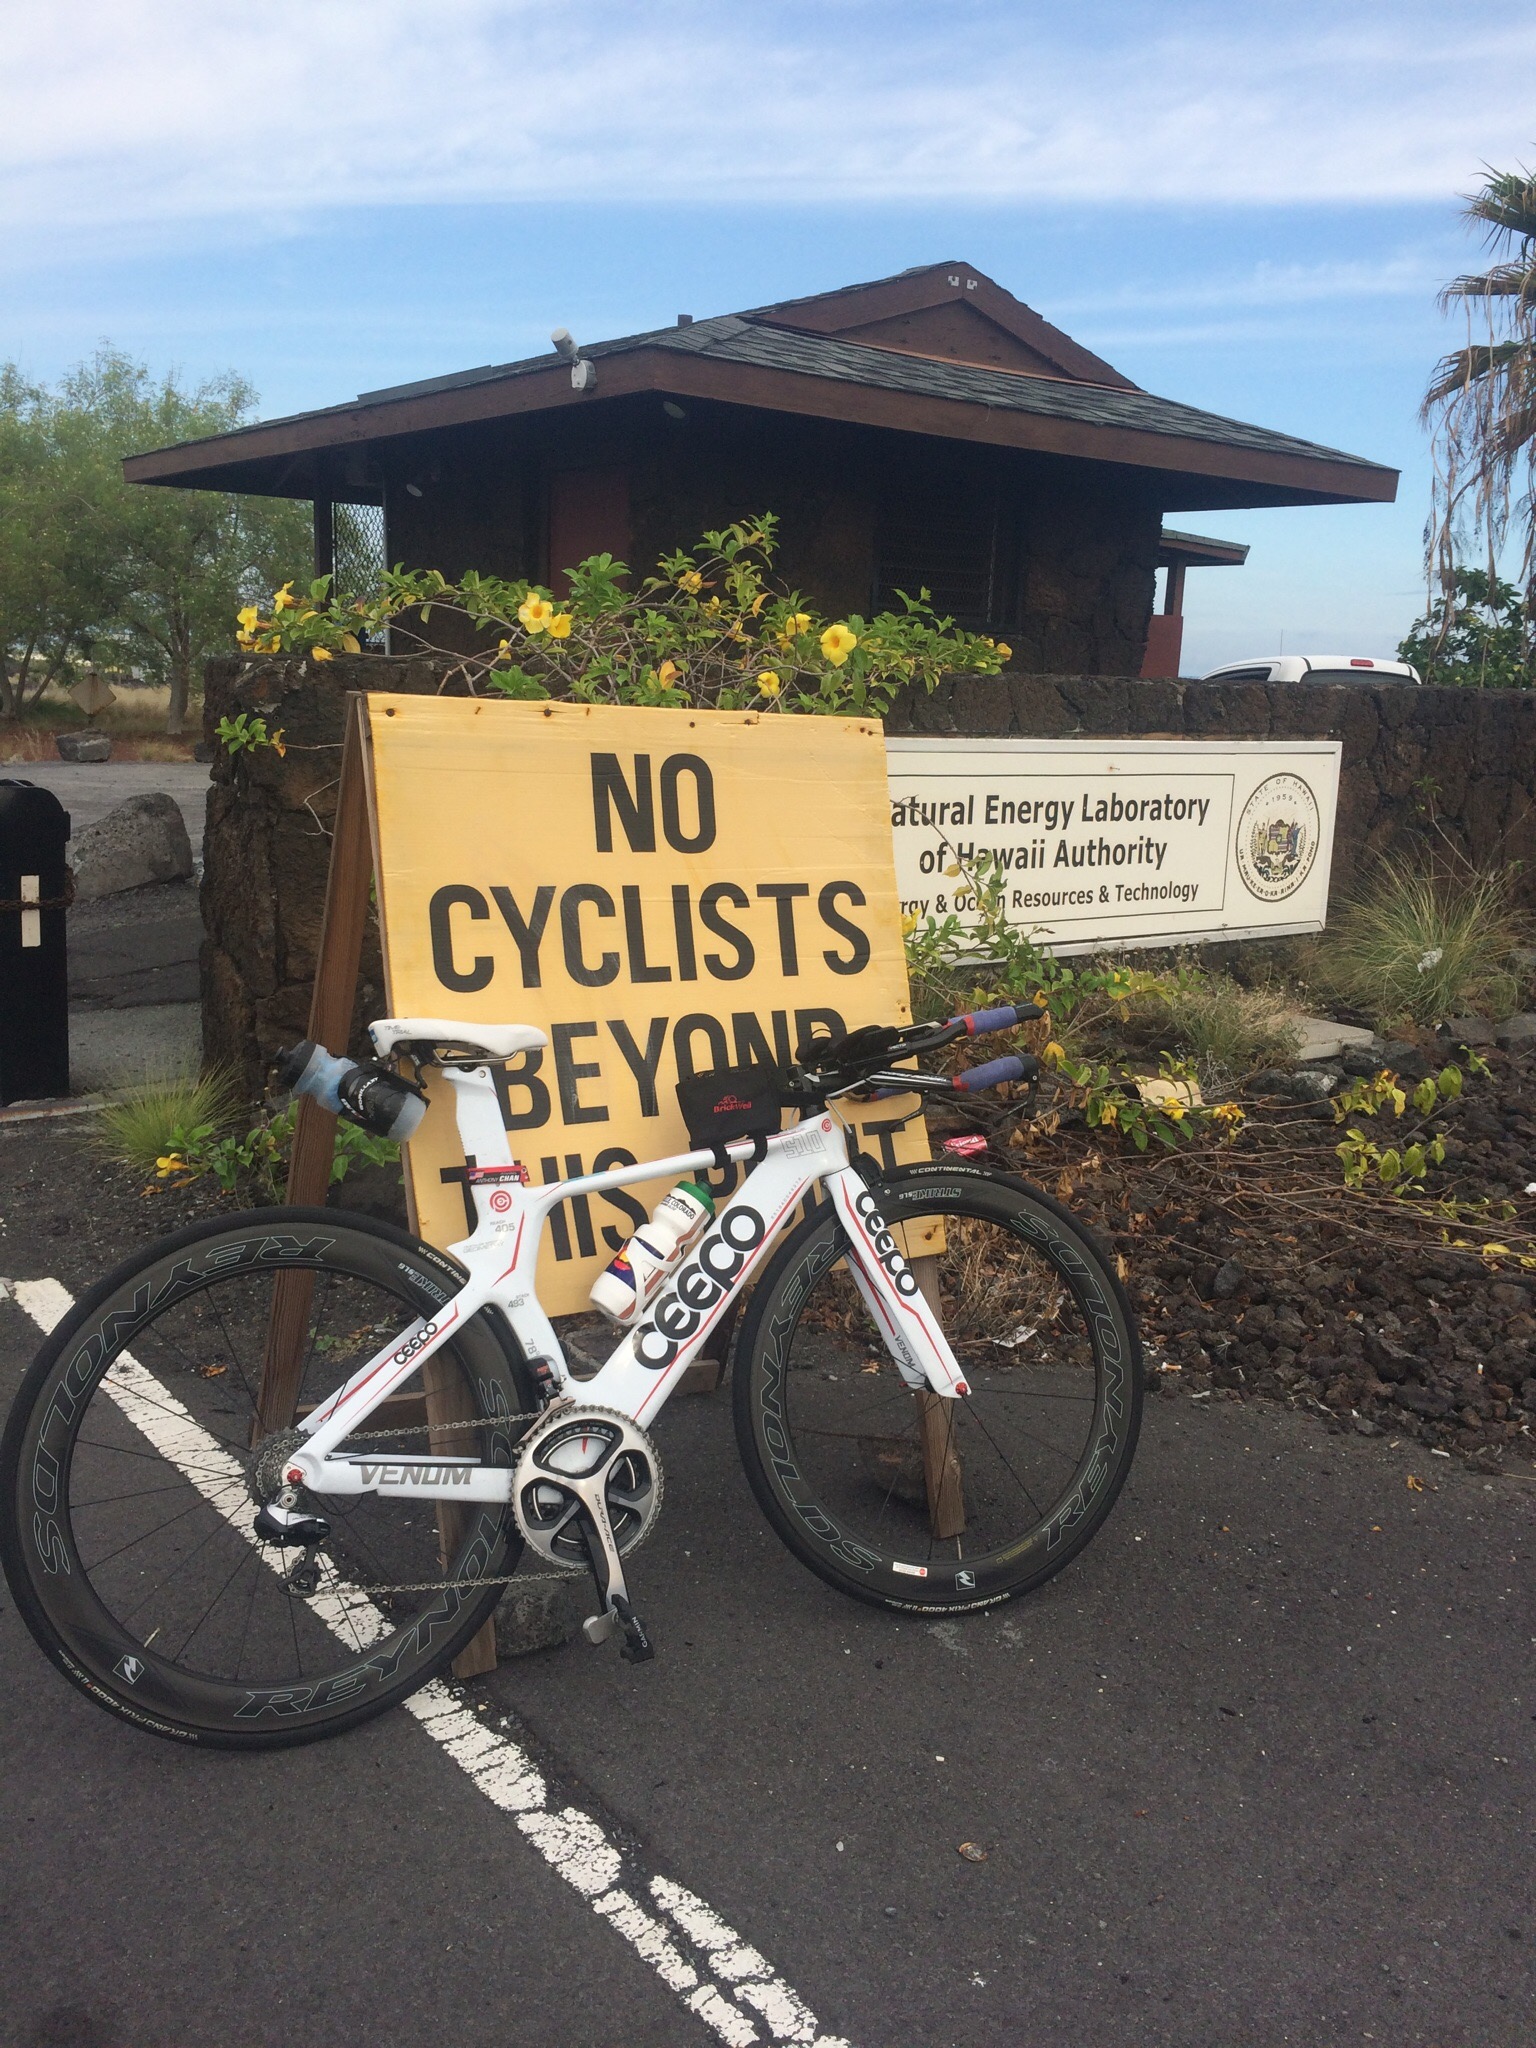
Hey there. I didn’t want to do a write up of the CEEPO Venom until I’ve had the chance to put the bike through some training and racing. Many of you already know, from pictures and such, that I’ve been riding this frame for a few months now. The CEEPO Venom just got back from the Big Island of Hawaii, got a proper cleaning (salt water is super corrosive), and is now ready to tackle the off season.

Thank you CEEPO Triathlon Bikes for providing me with the Venom. The model I received is the 2014 edition, blanketed with a nice coat of white and red glossy paint. The CEEPO Venom was designed for long course riding, especially for triathletes tackling the half ironman (70.3) and Ironman (140.6) distances.

There are some features of this bike that I like, including the ability to choose my own front brake, cockpit, and the ability to fit both electronic and mechanic drivetrain systems. For my Venom, I chose to to run Shimano Dura-Ace 9000 Di2. All the e-tube wires are run through the frame. And for simplicity of the initial fit process, I carried over the cockpit from my previous triathlon bike, the Slice.

I built this bike from the ground up, so making a few personal modifications were inevitable.

Reverse Brake Routing

To provide a cleaner front end, I swapped the left and right brake cabling. The front brake was routed so that the right lever controls the braking – simple, efficient, and works perfectly with the Dura-Ace 9000 front brake.

The rear is a bit more complicated, since it uses the Tektro R725, “u-brake” style system mounting under the bottom bracket. The brake cabling for the rear starts on the left side of the down tube, runs through the frame, and comes out near the bottom bracket. The entire brake cable goes through the frame – it was designed that way. Routing the brake cable through the left lever resulted in a much cleaner front end cable routing and less inner cable bend.

Tip: Install an in-line barrel adjuster to make adjusting brake cable tension on the fly a breeze!

Hindsight Tip: Since the rear brake is located at the dirtiest possible area of the bike, make sure you keep the brake as clean as possible, or else the brake will not work properly, (I learned this the hard way when my brake arms seized up and stopped working.)

Rear Dérailleur e-tube wire routing
The CEEPO Venom has two holes on the seatstay, one near the middle and one a bit further closer to the rear hanger. I choose to run the electronic cable from the hole that was closer because that hole faces downward, exposing less cable.

All I all, I’m super happy with the CEEPO Venom. It’s first race was at Toughman New York, where it helped me come from behind after a slow swim to capture my 3rd age group win in a row. Since then, it has raced both Ironman Maryland and Ironman Kona; and now it is ready for another round of training!

Thanks for reading!
Cheers.

IMG_9607.jpg

IMG_9621.JPG

IMG_9618.JPG

Get Comfortable with ISM Saddles

I am honored to announce that I have joined the ISM (Ideal Saddle Modification) team of athletes & ambassadors!
IMG_3811

I’ve been using their saddles since 2012 and no other saddle that I’ve tried in the past 4 years of cycling has matched their level of comfort. I’m still the new kid on the block when it comes to cycling but when it comes to comfort, I feel like I’ve struck gold with ISM. The technology behind these saddles is really cool because it focuses on shifting your body weight to where it should be instead of at the perineal region where numbness occurs. This next picture pretty much sums it up 🙂

ADAMO Pressure Test

ISM provides a broad range of saddles, from cruiser style seats to your time trial specialist saddle; meaning that there has to be at least one on their lineup that will fit you well. As for me, I have 3 saddles in the rotation, all of which have their own special qualities for each type of riding. Here are my setups!

Adamo TT – Cannondale Slice (time trial/triathlon)
This was my first ever ISM saddle. I bought it at a time when I just first started triathlon training. Like many others out there, I wanted a saddle that was comfortable, whether I was doing a recovery ride on the trainer or hitting the hills for interval repeats. I don’t remember where I first tried the Adamo TT but I remember how much I liked the feel of it…and then I absolutely loved the comfort when I was 4 hours into my ride. The TT saddle has sloped front arms for extra relief, especially since I ride in a more aggressive position on the Cannondale Slice. I’ve logged thousands of miles on this saddle, throughout 2 Ironman seasons, and I look forward to many more.

IMG_3760

Adamo Podium – Trek Domane (road/commuter)
I chose the Podium for my commuter bike mainly because it has a bit more padding than the Attack. It’s also wider, so it gives me slightly more stability when riding with no-hands 😉 Before mounting the saddle, it weighed in at 300 grams, which isn’t significantly light, but the trade-off for comfort is worth it.

20140224-160426.jpg

20140224-160438.jpg

Adamo Attack – Cannondale Supersix Evo (road)

The latest to my collection of ISM saddles is the Adamo Attack. The Supersix Evo came with the Fizik saddle which would make me go numb in about 45 minutes of easy riding – that’s certainly a recipe for disaster. I’m not much of a weight weenie but when it comes to my 14 pound Evo, I try to be more careful as to not add unnecessary weight to this machine. This is where the Attack comes in. It’s sleek, narrower for road races, light, and of course, feels great under my chamois.

IMG_3904

IMG_3906

IMG_3908

Now it’s your turn! Find out what saddle is right for you, HERE 🙂 

…or come over and try my 3 saddles!

Garmin Vector Power Meter Installation

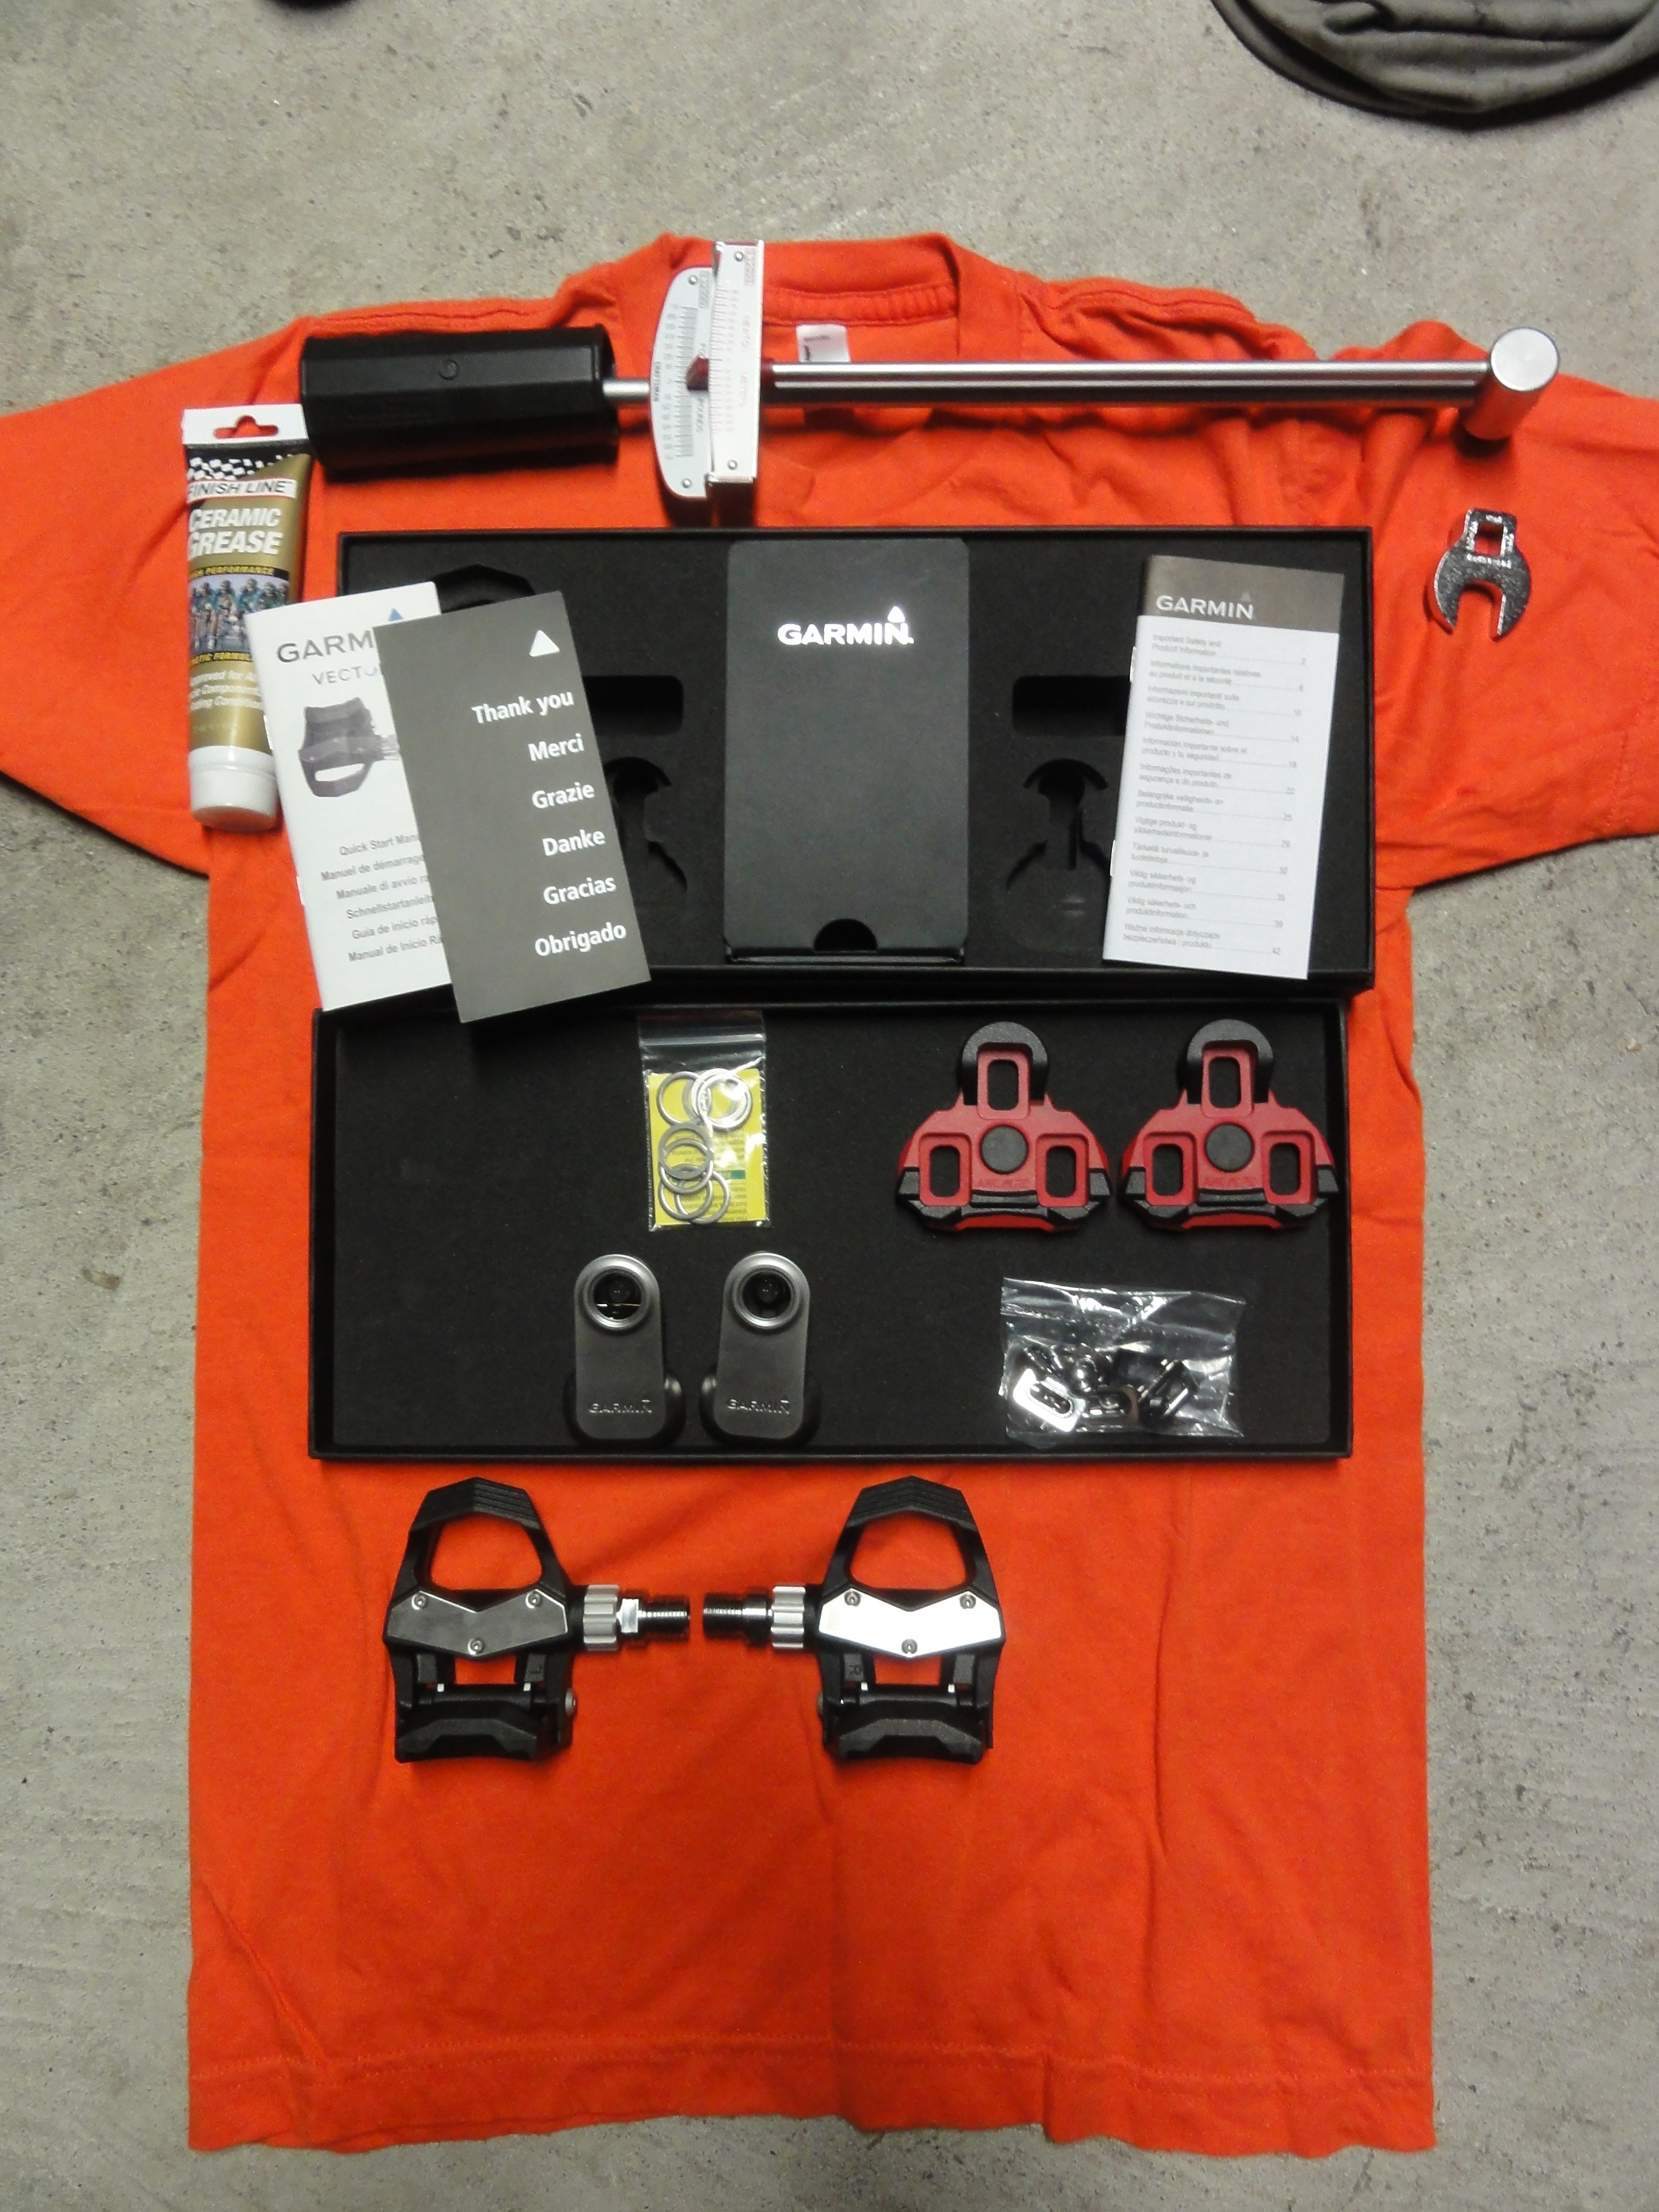
Thanks to the extensive and comprehensive of D.C. Rainmaker’s Garmin Vector installation and in-depth review, I took it upon myself to try and install them. Finding the spare installation parts were easy – I got the torque wrench at Sears, crowfoot adapter on Amazon 😎

The installation took me about 15 minutes , and then an additional 15 minutes updating the firmware through my Macbook. I have a ton of old race t-shirts, so they have been repurposed as a placemat for the Vectors , lol


DSC05983


Once you open everything up, you will see the pedals, cleats, manuals, pedal pods, ANT+ USB adapter, and washers. Really straight forward stuff.

DSC05984

DSC05985

DSC05986

DSC05987

DSC05988

The next part was a bit trickier because in order to update the pedal’s firmware, you need to connect it to the computer. When you have the ANT+ stick plugged in and the Vector Update program running, you will need to take the batteries out of the pedal pods, then put them back in before the update can begin. But once the pedals were detected, the process was quick. I walked away and came back and it was all done.

DSC05990


Overall, I had an easy time installing the pedals. I’ve been testing them for the past couple of weeks so stay tuned for a review.

Note: I installed the Vectors on my Slice so that I could compare power meters. Vectors VS. Quarq S975 – the result, almost identical average power! 

Theme: Overlay by Kaira